Cumulative Tables in dbt
How to build cumulative tables in dbt
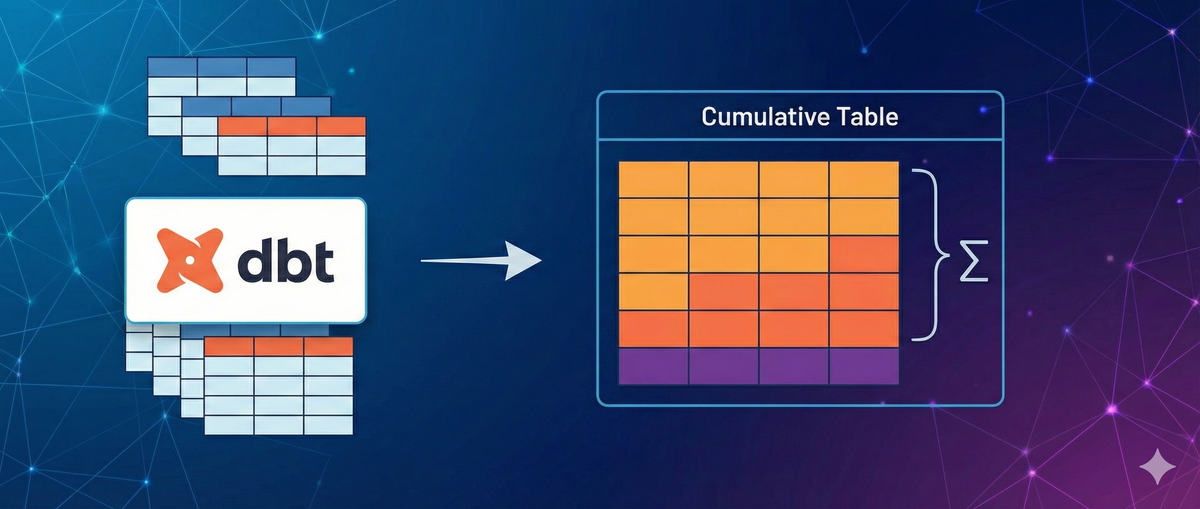
What are cumulative tables?
I first learned about cumulative table design from Zach Wilson. It’s a pretty powerful technique to quickly and efficiently update data over a long timeframe. If you want to learn more, check out his work.
The components of a cumulative table model
There are 4 main components to a cumulative table:
- A null / dummy row to “seed” the table as the first
yesterdayCTE entry, - A
yesterdayCTE that reads from the cumulative table, properly scoped to the previous day (or whatever timeframe you’re using), - A
todayCTE that gets today’s aggregated event data to update the table, and - A
combinedCTE that does afull outer joinagainst theyesterdayandtodayCTEs.
This is where the relatively newer microbatch incremental strategy comes to the rescue! Using this incremental strategy we can accomplish all 4 in our model. The downside is it makes the model quite verbose, but hopefully dbt makes improvements to microbatch in the future to reduce how much boilerplate you need to write.
Building a cumulative table model in dbt
To illustrate how to build a cumulative table, I’ll take the queries from Zach’s educational repo (linked in the first paragraph), and convert them to dbt. I’ll be using Snowflake SQL syntax throughout, but this is possible with whatever data warehouse you prefer.
Step 1: the upstream model
First we need our upstream table that we’ll be using to feed into our cumulative table — active_users_daily. For simplicity’s sake, we’ll assume this is a view built on top of a source table where event data is streamed in. The event_time config value here is integral — all models upstream of a microbatch model need to have this defined for the microbatch model to function properly. With that said, here’s the code for active_users_daily:
{{
	config(
		materialized="view",
		event_time="snapshot_date"
	)
}}

select
	event_time::date as snapshot_date,
	user_id,
	-- if the user_id has at least one event, then they are active
	count(user_id) > 0 as is_active_today,
	count_if(event_type = 'like') as num_likes,
	count_if(event_type = 'comment') as num_comments,
	count_if(event_type = 'share') as num_shares
from {{ source('streaming_source', 'events') }}
group by snapshot_date, user_id
Step 2: The config block
Microbatch models need specific configs, namely event_time, batch_size and begin. We set full_refresh to false following guidance from dbt:
As a best practice, we recommend configuring full_refresh: false on microbatch models so that they ignore invocations with the --full-refresh flag.
Note that running dbt run --full-refresh on a microbatch model by itself will not reset or reload data unless you also specify --event-time-start and --event-time-end. Without these flags, dbt has no way of knowing what time range to rebuild.
{{
	config(
		materialized="incremental",
		incremental_strategy="microbatch",
		event_time="snapshot_date",
		batch_size="day",
		begin="2020-01-01",
		full_refresh=false,
	)
}}
Step 3: The “seed” batch
Our seed batch needs to give us the appropriate table schema so that the combined CTE works properly on the first run, but doesn’t need to return any data. We accomplish this by using a Jinja conditional block inside our yesterday_batch CTE to change the definition of the CTE when the model is first run. The simplest way to check if our table already exists in the warehouse or not is to use the is_incremental() dbt Jinja function, despite having set full_refresh to false.
Also, because dbt doesn’t have the batch context when it runs a parse, we add one more condition so this batch gets used for parsing and dbt doesn’t yell at us. With that, our seed batch looks like this:
with yesterday as (
	{% if not model.batch or not is_incremental() %}
		select
			'9999-12-31'::date as snapshot_date,
			1234 as user_id,
			false as is_daily_active,
			false as is_monthly_active,
			false as is_weekly_active,
			[0]::array(number) as activity_array,
			[0]::array(number) as like_array,
			[0]::array(number) as comment_array,
			[0]::array(number) as share_array,
			0 as num_likes_7d,
			0 as num_comments_7d,
			0 as num_shares_7d,
			0 as num_likes_30d,
			0 as num_comments_30d,
			0 as num_shares_30d
		where false
	{% else %}
...
The values themselves don’t matter here, it’s ensuring the data types are correct and using where false to ensure we get an empty result set back.
Step 4: yesterday CTE
For the actual yesterday CTE logic, we can just select * from our model, and use dateadd with our model.batch.event_time_start to accurately get yesterday’s batch.
with yesterday as (
	{% if not model.batch or not is_incremental() %}
		select
			'9999-12-31'::date as snapshot_date,
			1234 as user_id,
			false as is_daily_active,
			false as is_monthly_active,
			false as is_weekly_active,
			[0]::array(number) as activity_array,
			[0]::array(number) as like_array,
			[0]::array(number) as comment_array,
			[0]::array(number) as share_array,
			0 as num_likes_7d,
			0 as num_comments_7d,
			0 as num_shares_7d,
			0 as num_likes_30d,
			0 as num_comments_30d,
			0 as num_shares_30d
		where false
	{% else %}
		select *
		from {{ this }}
		where snapshot_date = dateadd('day', -1, '{{ model.batch.event_time_start }}')::date
	{% endif %}
)
Step 5: today CTE
The important thing to note for today CTE is we do not need to add a where clause filtering the data to the appropriate date range. The microbatch strategy takes care of this for us!
with yesterday as (
	{% if not model.batch or not is_incremental() %}
		select
			'9999-12-31'::date as snapshot_date,
			1234 as user_id,
			false as is_daily_active,
			false as is_monthly_active,
			false as is_weekly_active,
			[0]::array(number) as activity_array,
			[0]::array(number) as like_array,
			[0]::array(number) as comment_array,
			[0]::array(number) as share_array,
			0 as num_likes_7d,
			0 as num_comments_7d,
			0 as num_shares_7d,
			0 as num_likes_30d,
			0 as num_comments_30d,
			0 as num_shares_30d
		where false
	{% else %}
		select *
		from {{ this }}
		where snapshot_date = dateadd('day', -1, '{{ model.batch.event_time_start }}')::date
	{% endif %}
),

today as (
	select *
	from {{ ref('active_users_daily') }}
)
Step 6: combined and final select
This logic is the exact same as what’s in Zach’s repo — we’ve already done all the tricky bits in our yesterday and today CTEs.
with yesterday as (
	{% if not model.batch or not is_incremental() %}
		select
			'9999-12-31'::date as snapshot_date,
			1234 as user_id,
			false as is_daily_active,
			false as is_monthly_active,
			false as is_weekly_active,
			[0]::array(number) as activity_array,
			[0]::array(number) as like_array,
			[0]::array(number) as comment_array,
			[0]::array(number) as share_array,
			0 as num_likes_7d,
			0 as num_comments_7d,
			0 as num_shares_7d,
			0 as num_likes_30d,
			0 as num_comments_30d,
			0 as num_shares_30d
		where false
	{% else %}
		select *
		from {{ this }}
		where snapshot_date = dateadd('day', -1, '{{ model.batch.event_time_start }}')::date
	{% endif %}
),

today as (
	select *
	from {{ ref('active_users_daily') }}
),

combined as (
	select
		-- We need to coalesce here since today.user_id may be a new user we've not seen before
		coalesce(yesterday.user_id, today.user_id) as user_id,
		case
			when yesterday.activity_array is null
		-- If yesterday.activity_array is null (indicating a new user), we have to coalesce with an array with a single entry.
		-- This array just holds the value for today since that's all the history we have.
			then [coalesce(today.is_active, 0)]
		-- We're also checking the size of the array because we're only keeping the last 30 days of history.
			when array_size(yesterday.activity_array) < 30
			then array_prepend(yesterday.activity_array, coalesce(today.is_active, 0))
			else array_prepend(
				array_slice(yesterday.activity_array, 0, 29),
				coalesce(today.is_active, 0)
			)
		end as activity_array,
		...
		'{{ model.batch.event_time_start }}')::date as snapshot_date
	from yesterday
	full outer join today
		On yesterday.user_id = today.use_id
)
select
	user_id,
	activity_array[0] as is_daily_active,
      -- if any of the array values are 1, then the user was active in the last month
      {{ array_sum('activity_array', 30) }} > 0 as is_monthly_active,
      -- if any of the first 7 array values are non-zero, then the user was active in the last week
      {{ array_sum('activity_array', 7) }} > 0 as is_weekly_active,
      activity_array,
      like_array,
      share_array,
      comment_array,
      {{ array_sum('like_array', 7) }} as num_likes_7d,
      {{ array_sum('comment_array', 7) }} as num_comments_7d,
      {{ array_sum('share_array', 7) }} as num_shares_7d,
      {{ array_sum('like_array', 30) }} as num_likes_30d,
      {{ array_sum('comment_array', 30) }} as num_comments_30d,
      {{ array_sum('share_array', 30) }} as num_shares_30d,
      snapshot_date,
from combined
For reasons known only to God and Sridhar, Snowflake lacks a built-in array_sum function, so I’ve made a macro to emulate it:
{% macro array_sum(array_name, window_size, element_type = 'number') %}
    {#
        Generates SQL to sum the first N elements of an array using reduce.

        Args:
            array_name: Name of the array column to sum (e.g., 'swipes_sent_array')
            window_size: Number of elements to sum from the start of the array (e.g., 7, 28)
            element_type: Snowflake data type of array elements (default: 'number')

        Returns:
            SQL expression that sums the first window_size elements of the array.

        Example usage:
            {{ array_sum('swipes_sent_array', 7) }} as swipes_sent_7d,
            {{ array_sum('likes_received_array', 28) }} as likes_received_28d
    #}
    reduce(
        array_slice({{ array_name }}, 0, {{ window_size }}),
        0,
        (acc {{ element_type }}, val {{ element_type }}) -> acc + val
    )
{%- endmacro %}
And that’s it! You know have a pattern to create cumulative tables in dbt. I’ve found these to be extremely performant, but the downside is those tables have to be loaded sequentially — backfills can take a long time as a result (which also means they can be expensive).